Skip to main content
Exterior Pro Materials
KaycanBoard & Batten Vertical

The Allure of Authentic Cedar

Kaycan Board & Batten Vertical

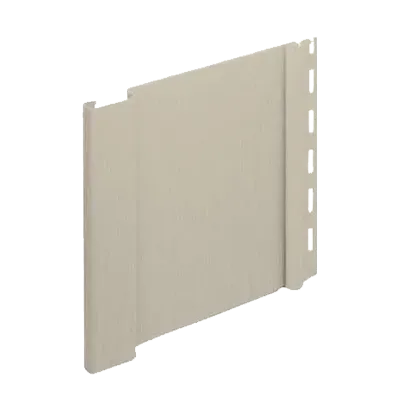
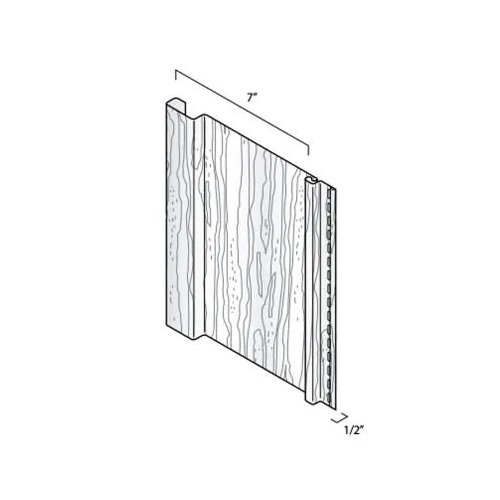
Kaycan Board & Batten Vertical siding captures the allure of authentic cedar with a heavy-gauge vinyl profile that won't rot, warp, or need painting. The full 7" vertical panel with distinct shadow lines and tongue-and-groove cedar plank appearance delivers striking depth and dimension on any exterior — from full-wall treatments to gable accents and lower-course features. Duratron™ Vinyl Technology ensures long-term weatherability in Canadian conditions, while the low-gloss woodgrain finish in 17 colours keeps the look of freshly painted wood year after year.

0.050" (heavy gauge)17 colours

Available Colours

17
Kaycan Board & Batten Vertical - Azure Blue

Azure Blue

Board & Batten Collection

Board & Batten Collection(17)

Colours shown are approximate representations only and may appear differently on screen than the actual product. Request a physical sample before making your final decision.

Profiles & Specifications

Kaycan Board & Batten Vertical - Board & Batten Vertical profile
0251Board & Batten Vertical

Full 7" vertical panel with distinct shadow lines and tongue-and-groove cedar plank appearance — ideal as a full-wall treatment, gable accent, or lower-course feature

Length10' (3.05 m)
Panels/Box17 panels/carton
Coverage100 sq. ft. (9.29 m²) per carton
Gauge0.050" (heavy gauge)
Profile Depth1/2" full
Exposure7" full
FinishLow gloss, woodgrain only

Compatible Accessories

Installation Guide

Critical Installation Rules

  1. Install only on a smooth, flat surface — do NOT install over strapping; use underlayment to provide a flat surface if needed

  2. Work from the Vertical Base Trim upward; lock each panel and fasten every 12" vertically

  3. Place the first fastener in the uppermost end of the top nail slot to hold panel in position

  4. Place all remaining fasteners in the centre of the nail slots; fasten every 12"

  5. Leave 3/8" clearance above all horizontal joints at windows, doors, and other obstacles

  6. Leave 1/4" clearance below all horizontal joints at windows, doors, and other obstacles

  7. Leave 1/32" to 1/16" clearance between nail head and siding panel (panels must move freely)

  8. Never face-nail siding — always fasten through the nailing hem only

  9. Leave 1/4" expansion gap at all trim junctions — increase to 3/8" in cold climates or below 40°F

  10. Do not caulk between panels or between siding and J-channel — panels must expand and contract freely

  11. Drive fasteners straight and level — nailing at an angle distorts panels and causes buckling

  12. Apply drip cap above all windows, doors, and horizontal breaks before installing siding over them

  13. Use fasteners long enough to penetrate a minimum of 3/4" into the nailable base

  14. Check every fifth or sixth panel for plumb alignment; also check alignment with adjoining walls

  15. Check all local building codes and fire regulations before installation; local code requirements always take precedence

Tools & Equipment

General Tools

  • Work table
  • Chalk line
  • Safety glasses
  • Tape measure
  • Carpenter's square
  • Ladders or scaffolding
  • Hammer
  • Tin snips
  • Utility knife
  • Level / plumb bob
  • Radial arm saw (with reversed fine-tooth blade for cutting vinyl)

Specialty Tools

  • Snap-lock punch — creates raised tabs on cut panels to lock into trim
  • Nail-slot punch — adds or extends nailing slots in repositioned panels
  • J-trim cutter — clean cuts on J-channel without distortion
  • Siding removal tool (zip tool) — unlocks siding panels during repairs

Fastener Requirements

Nails
Material
Aluminum, galvanized steel, or corrosion-resistant
Head
5/16" minimum
Shank
1/8"
Penetration
3/4" into solid wood
Screws
Type
#8 truss head or pan head, self-tapping
Penetration
3/4" into solid wood
Clearance
1/32"–1/16" clearance required (do not overtighten)
Staples
Gauge
16-gauge minimum
Crown
Semi-flattened elliptical crown
Penetration
3/4" into solid wood
Hem clearance
1/32" from nailing hem edge

Accessory Applications

AccessoryPurposeWhere to use
Vertical Base Trim (1175)Designed specifically for vertical siding — provides a secure base channel that supports panel weight and prevents inward movement at the baseStarting base for vertical panel installation — anchors first panels and sets wall alignmentBottom of wall, level, before the first vertical panel course
5/8" J Trim (1035)5/8" deep channel accommodates panel movement; allow 3/8" clearance above horizontal joints and 1/4" below per technical bulletinFrames all wall penetrations and terminates siding at top of wall under soffitAround door and window openings (sides, top, bottom); under soffits at top of wall
H Trim (1179)5/8" channels on both sides receive adjacent panel ends — provides weathertight horizontal joint without face lappingJoins panels end-to-end on tall walls requiring more than one panel heightAt horizontal seams where panel tops and bottoms meet; keep seams staggered
Drip Cap (1185)2" height; install before siding — vertical panels overlap the drip cap flange for positive drainageDirects water away from horizontal breaks and opening topsAbove all windows and doors, and at any horizontal band break in the vertical run
3" Outside Corner (1105)3" wide face — sized for the full 7" Board & Batten panel; provides clean, weathertight outside corner finishFinished outside corners where two vertical-sided walls meet at an exterior anglePlumb at outside corners; vertical panels slide into the 5/8" channels on each face

Estimating & Ordering

Formula

Siding required = [Wall area (Step 1) + Gable/dormer area (Step 2) − Openings area (Step 3)] + 10% waste

1 square = 100 sq.ft. (standard industry unit); Board & Batten carton covers 1 square exactly

  1. Step 1 — Sketch all four sides of the home; for each wall multiply height × width to get surface area in sq.ft.

  2. Step 2 — Measure gables and dormers: for each triangle measure straight up from the base to the top, then multiply base × height × 0.5; add all gable/dormer areas together

  3. Step 3 — Measure all openings NOT to be covered (windows, doors, chimneys) and multiply height × width for each; add together

  4. Step 4 — Add Step 1 + Step 2, subtract Step 3, then add 10% for cutting waste: Siding required = [Step 1 + Step 2 − Step 3] + 10%

  5. Step 5 — Divide total sq.ft. by 100 to determine the number of cartons needed (1 carton = 100 sq.ft.); round up to next whole carton

  6. Step 6 — Measure under eaves: multiply the length by the width of each overhang and add together (for soffit calculation)

  7. Step 7 — Determine soffit squares: divide soffit total from Step 6 by 100

  8. Step 8 — Measure linear feet of each accessory (vertical base trim, J-trim, H trim, drip cap, outside corners)

  9. Step 9 — Order accessories: vertical base trim, J-trim, H trim, and drip cap by linear feet (10'–12' lengths); outside corners by linear feet (10' lengths)

Colour is manufactured throughout the panel — scratches or cut edges are not visible from normal viewing distance

Storage & Handling

  • Store cartons flat on a level surface, supported along their full length
  • Keep cartons dry and away from rain and prolonged direct sunlight
  • Store away from areas where falling objects or construction activity may cause damage
  • Maximum stacking height: 6 boxes high — ensure stacks are stable
  • Maximum storage temperature: 130°F / 54.4°C (avoid blacktop pavement in summer, dark tarps without air circulation)
  • Do not drag bundles — carry or use a panel carrier to avoid scratching and distortion

Ready to order Kaycan Board & Batten Vertical?

Submit your spec list and we'll respond with pricing and availability - usually within one business day. Available in 17 colours for your project.

Get a wholesale quote

Tell us the product, colour, and quantity - we'll handle the rest.

Request a Quote
or call us at+1 (905) 836-7272