Alpa Vinyl Railings from Mitten bring lasting, low-maintenance style to Canadian decks, porches, and entranceways. Manufactured by Alpa Ontario Railing Inc., these code-compliant vinyl railings never need painting or staining and install quickly over a structural post. Choose from six profile lines — the timeless Classic, decorative Classic Deco, premium Executive, open-view glass series, or bold Estate X-Series — all meeting OBC and NBC height and spacing requirements. Backed by a 5-Year Limited Warranty.
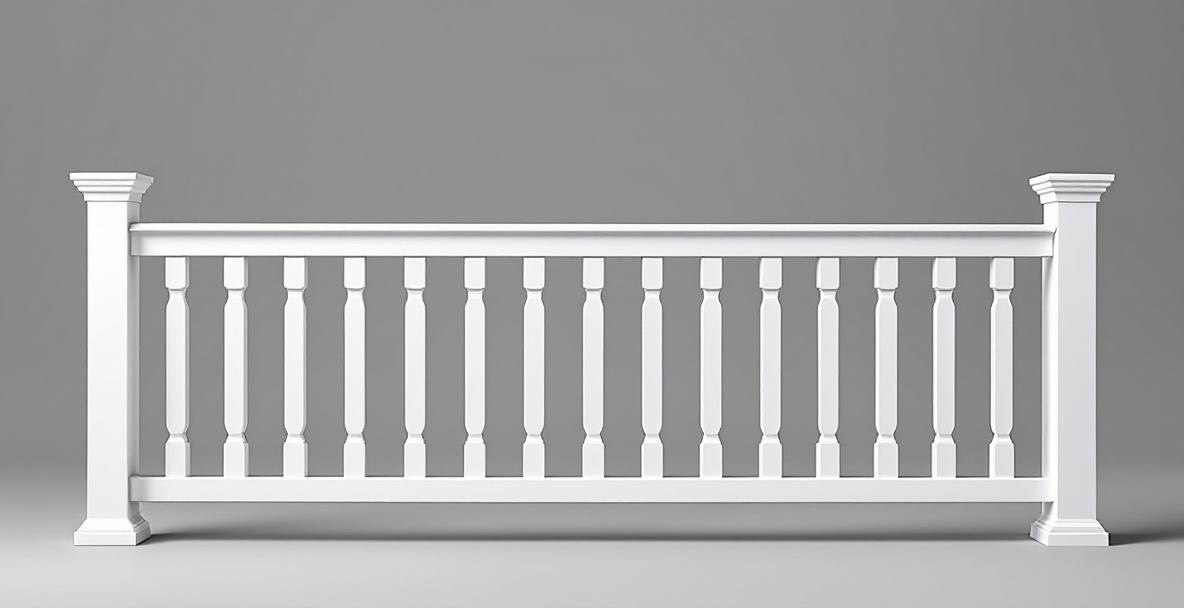
Alpa Vinyl Railings from Mitten are the low-maintenance, code-compliant railing solution for Canadian decks, porches, and entranceways. Manufactured by Alpa Ontario Railing Inc., these vinyl railings install over a structural post and never need painting, staining, or replacement due to rot or rust. Six profile lines cover the full range of residential design tastes — from the clean and affordable Classic and Builder series to the premium Estate X-Series with its bold X-pattern baluster and the open-view Executive Glass and Modern Glass lines with 6mm tempered glass panels. All baluster-series profiles in the 1400 lineup use a 4"×4" post sleeve, wide 2 7/8" top handrail, and 1 3/8" square balusters spaced to meet the 3-3/4" maximum gap requirement of the Ontario and National Building Codes. The Classic and matching profiles are available in White, Clay, Cashmere, and Tan. Railing heights are 35" for decks up to 1.8m above grade and 42" for elevated decks, in compliance with OBC 2006 and NBC 2005, Section 9.8.8.2(1). Maximum post spacing is 8'-0" for baluster sections and 6'-4" for glass sections. The concealed fastener system minimizes exposed hardware for a clean, finished look. Backed by a 5-Year Limited Warranty.


