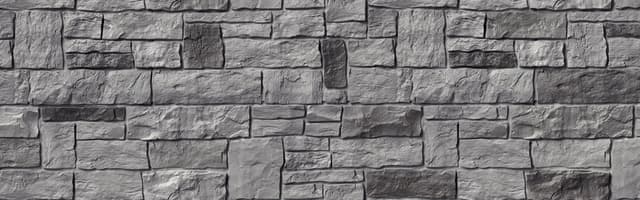
Skip to main content
Exterior Pro Materials
GenStoneGenStone Stone Veneer

GenStone Stone Veneer — Stacked Stone

GenStone Stone Veneer delivers the authentic look of real stacked stone — on any wall, inside or out. Panels cast from actual stone reproduce every texture and colour variation of natural masonry at a fraction of the weight and cost. No mortar, no mason, no heavy lifting: lightweight polyurethane panels install with screws and adhesive over wood, concrete, brick, or stucco. Available in 8 rich stone colours with a full system of corners, ledgers, trim, and pillar accessories. Backed by a 25-Year Limited Warranty.

1.25" depth (3.2 cm) | 3 lbs (1.4 kg) per panel8 colours

Available Colours

8
GenStone Stone Veneer — Stacked Stone - Vanilla Bean

Vanilla Bean

Stone

Stone(8)

Colours shown are approximate representations only and may appear differently on screen than the actual product. Request a physical sample before making your final decision.

Profiles & Specifications

GenStone Stone Veneer — Stacked Stone - Stacked Stone profile
SVStacked Stone

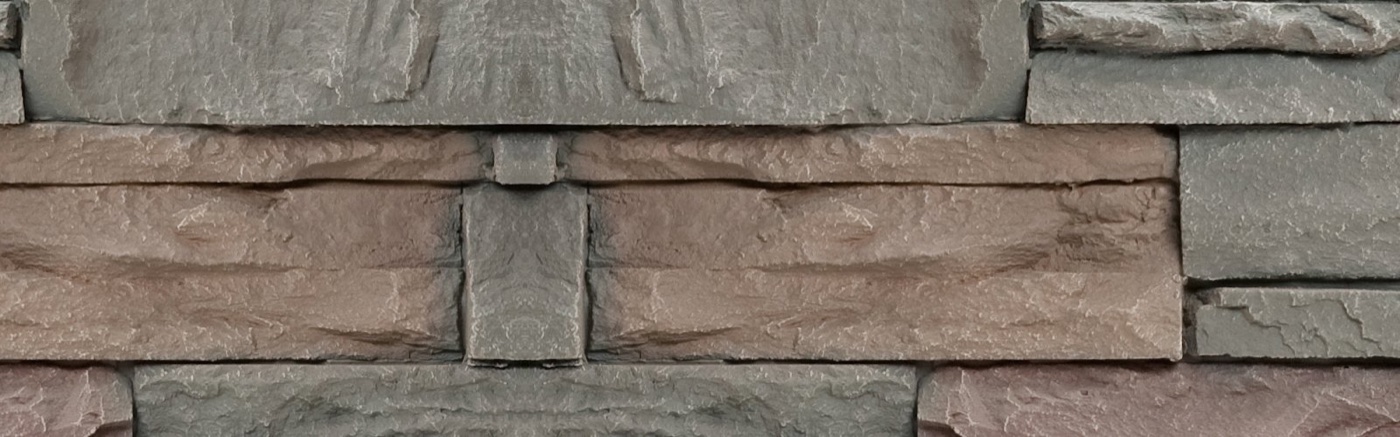
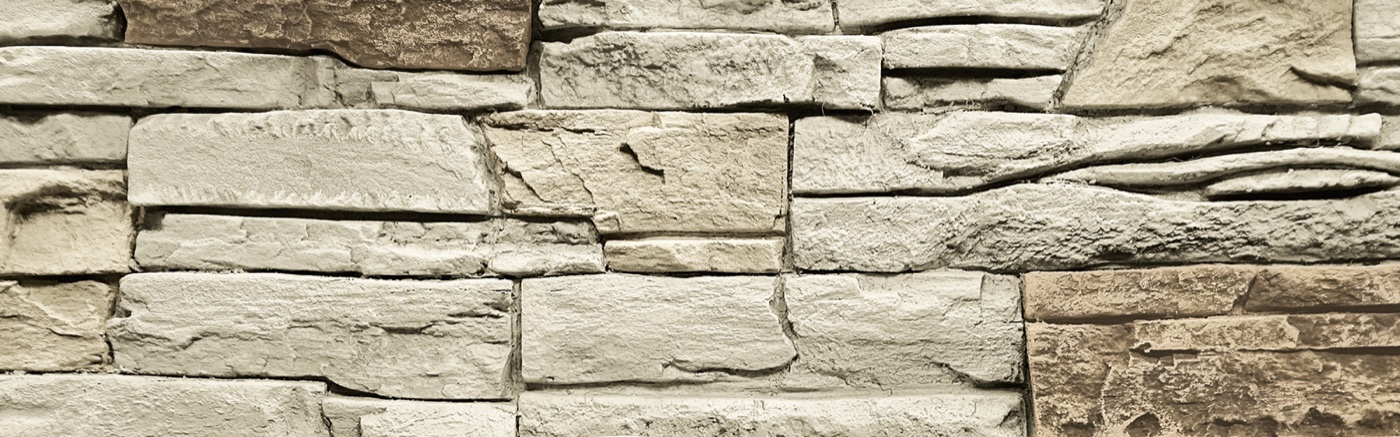
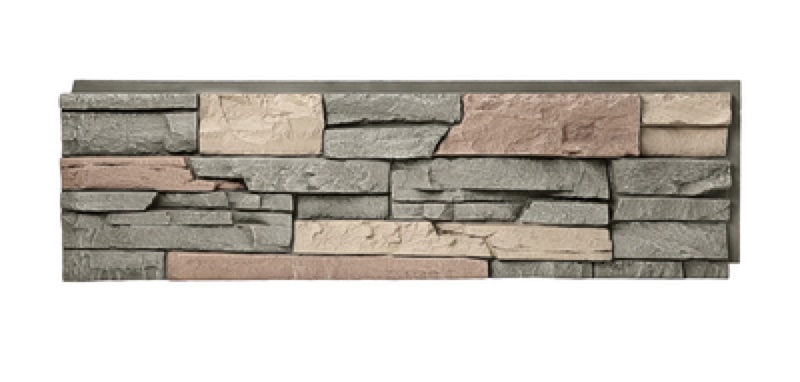
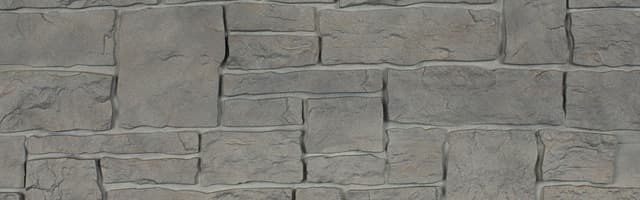
GenStone faux stone panels are cast directly from real stone, rock, and brick to recreate the unique texture, colours, and shapes of each masonry style — without the weight or installation complexity. The Stacked Stone profile delivers the clean, layered look of precision-cut stacked stone on any flat surface, indoors or out. Four authentic profile patterns and eight rich stone colours give designers the freedom to use real stone aesthetics anywhere: full facades, accent walls, pillars, fireplaces, and feature walls.

Length41" (104 cm) per panel
Height / Width11.25" (28.6 cm) per panel
Panel Weight3 lbs (1.4 kg) per panel
Coverage3.20 sq.ft. (0.30 m²) per panel
InstallationHorizontal — exterior or interior, over any flat structural substrate

Order quantities and lead times may vary. Contact your local Pro Materials branch for box/order quantities. Positive shiplap edge always goes on top. Stagger connections throughout the wall to avoid visible seams.

Certifications & Testing Standards

GenStone Stone Veneer — Stacked Stone meets or exceeds the following Canadian and international performance standards.

Test / PropertyStandardResult / Value
25-Year Limited Warranty — GenStone Enterprises, LLC
-Certified
R-Value: 3.41 per inch — thermal insulation value
-Certified
Waterproof and impact resistant — polyurethane construction
-Certified
Fade, peel, and blister resistant
-Certified

Compatible Accessories

Installation Guide

  1. Preparation: GenStone panels can be applied to any flat structural substrate — wood, concrete, brick, or stucco — that is clean and free of debris. Let panels acclimate for 48 hours before installation. Wait for consecutive days of moderate temperatures before starting. For exterior installations over brick, concrete, or stucco: install Tyvek HomeWrap first. Snap a chalk line as your level reference — do not rely on the ground for level.

  2. Tools required (exterior): hand or circular saw, level, utility knife, drill, tape measure, caulking gun (10 oz tube), framing square, 1.625" non-corrosive deck screws (panels), 2.50" non-corrosive deck screws (ledgers), marker, sandpaper, gloves, safety goggles, PL Adhesive (200 or 300), Big Stretch White Caulking.

  3. Tools required (interior over drywall): hand saw, drill, utility knife, tape measure, level, framing square, caulking gun, 2" drywall screws, marker, sandpaper, Big Stretch White Caulking. Note: PL Adhesive or any other construction adhesive is NOT recommended for interior projects on drywall substrates.

  4. Cutting: measure from the positive shiplap edge of the previous panel, corner, or finished edge and mark the cut on the flat (back) side. Circular saw: place panel back-side up. Table or miter saw: place panel front-side up. Hand saw: panel flat-side up. For small precise cuts (hose bibs, electrical boxes), use a hand saw, utility knife, drywall saw, or jig saw. Always paint any raw polyurethane exposed by cuts — unpainted material will discolor in sunlight.

  5. Panel orientation: the positive shiplap edge (raised locking edge) always goes on top. Work from left to right. Stagger the joints throughout the wall to avoid visible vertical seams — offset each row by at least half a panel.

  6. Attaching panels (exterior): apply an 'S' pattern of PL 200 or PL 300 construction adhesive to the back of each panel. Ensure the panel is level before fastening. Drive 1.625" non-corrosive deck screws every 6–8" along the top positive shiplap edge, plus 2–3 evenly spaced screws along the right positive shiplap edge. Check for any flex across the face of the panel — if flex is detected, eliminate it with a face screw hidden under a stone and concealed with eXact Color caulking. Finally, run a bead of Big Stretch caulk along the top positive shiplap edge before installing the next row.

  7. Attaching corners: apply 'S' pattern adhesive to the back. Drive 2 evenly spaced screws in the top horizontal 12" shiplap and 2–3 evenly spaced screws in both vertical 12" shiplap edges, plus 2–3 screws in both horizontal 6" shiplap edges. Face screws are recommended.

  8. Attaching ledgers: apply 'S' pattern adhesive to the back (exterior only). Run a bead of Big Stretch white caulking in the recessed niche where the ledger contacts the panel. Fasten with evenly placed face screws. Seal the junction between ledger and wall with Big Stretch or eXact Color caulking to create a watertight connection.

  9. Attaching trim: apply 'S' pattern adhesive to the back (exterior only). Run a bead of Big Stretch caulk along the side of the trim where it contacts other GenStone products or obstructions. Fasten with face screws after ensuring the trim is level.

  10. Finishing: after all panels, ledgers, and trim are fastened, conceal fastener holes with GenStone eXact Color caulking. To tint: follow the step-by-step video at genstone.com. Stone pieces require a combination of all 3 base colours; ledgers require only one. After caulking dries, blend the repair with GenStone paint kits (1 kit per 400 sq.ft.). Quantities: color match caulking — 1 tube per 400 sq.ft.; Big Stretch white caulking — 1 tube per 100 sq.ft.

  11. Building codes: review local building code prior to installation. Strapping may be required for exterior installations in Canada.

  12. Heat sources: test by holding your hand on the surface for 10 seconds while the heat source is running — if you can hold it, GenStone is acceptable. It is the owner's sole responsibility to ensure panels will not contact flames or embers.

  13. Care & maintenance: GenStone performs similarly to wood siding in most climates. Inspect annually for discoloration. Clean with mild soap and water. Follow the GenStone Use and Care Guide at genstone.com.

Ready to order GenStone Stone Veneer — Stacked Stone?

Submit your spec list and we'll respond with pricing and availability - usually within one business day. Available in 8 colours for your project.

Get a wholesale quote

Tell us the product, colour, and quantity - we'll handle the rest.

Request a Quote
or call us at+1 (905) 836-7272
GenStone Stone Veneer Stacked Stone | 8 Colours | Faux Stone Panels | Canada — Pro Materials