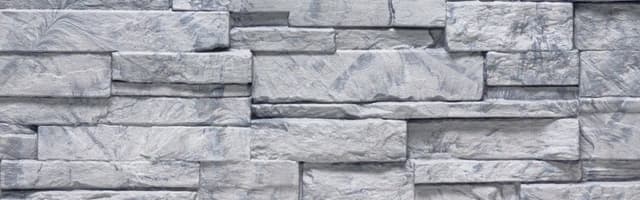
Skip to main content
Exterior Pro Materials
NovikNovikStone Artisan Cut

NovikStone AC Artisan Cut

NovikStone AC Artisan Cut brings traditional hand-laid stone to any wall — without the mortar. Rich natural stone colours and authentic hand-laid stacked stone texture create a striking appearance ideal for knee walls, accent walls, or full facades. Lightweight polypropylene panels install with standard nailing from grade level to the roofline, with no mortar, adhesives, or masonry tools. Certified under CCMC 13420-R, ICC-ES, and TDI, and backed by a Lifetime Limited Warranty.

3.3 lbs (1.5 kg) per panel2 colours

Available Colours

2
NovikStone AC Artisan Cut - Latte

Latte

Stone

Stone(2)

Colours shown are approximate representations only and may appear differently on screen than the actual product. Request a physical sample before making your final decision.

Profiles & Specifications

NovikStone AC Artisan Cut - Artisan Cut profile
ACArtisan Cut

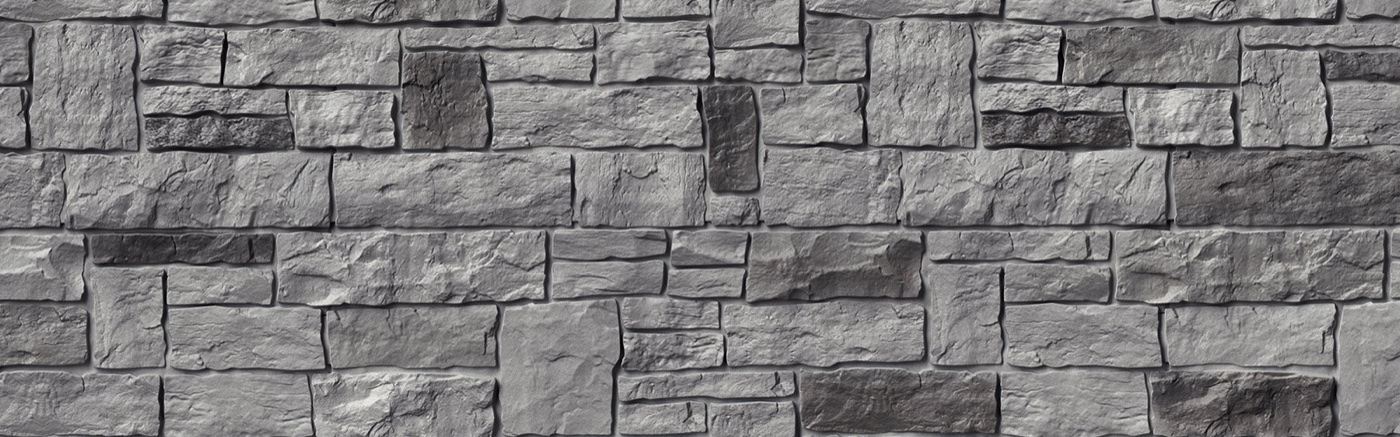
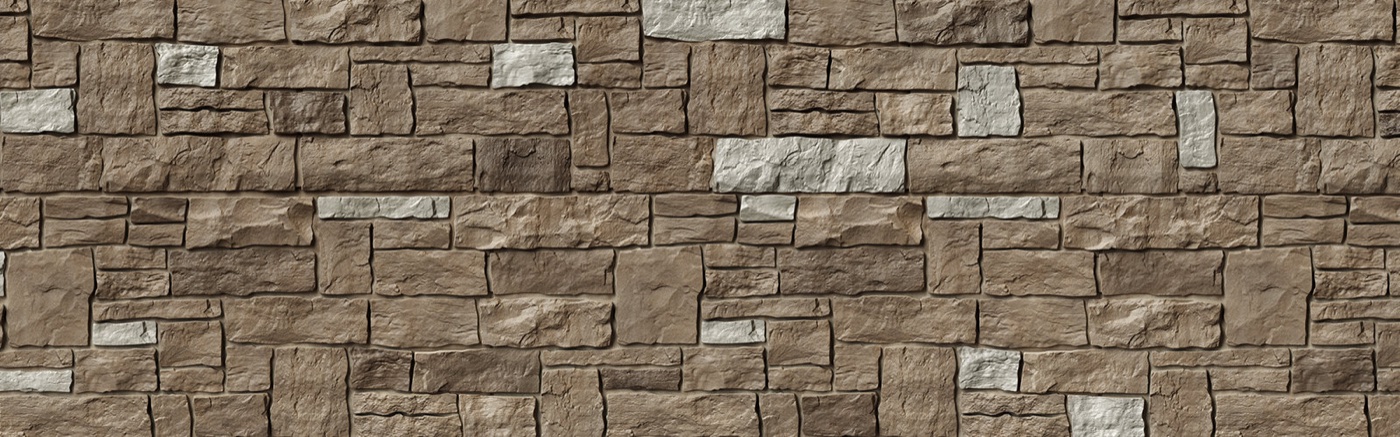
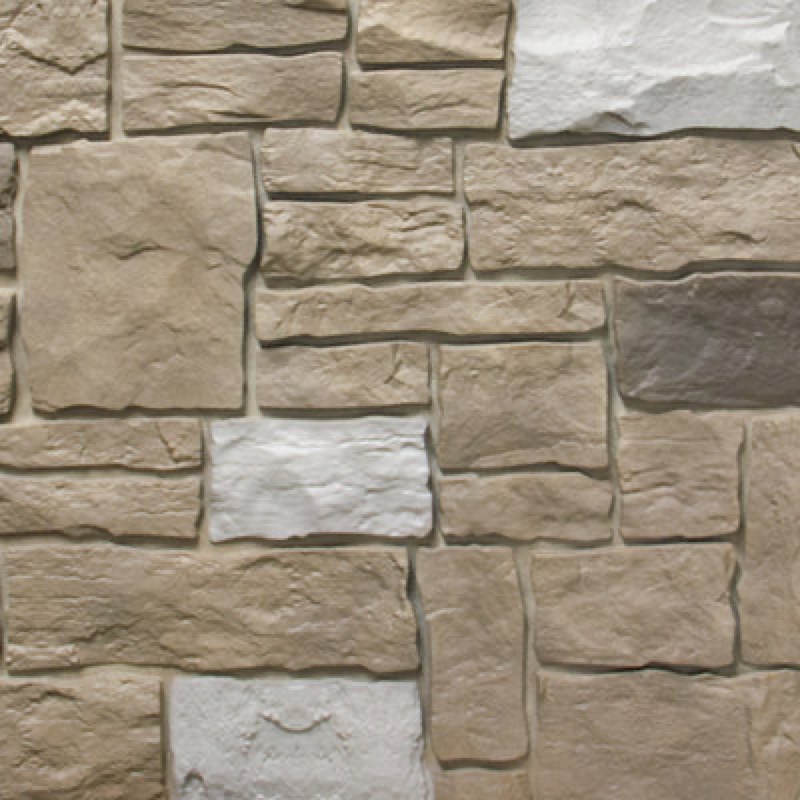
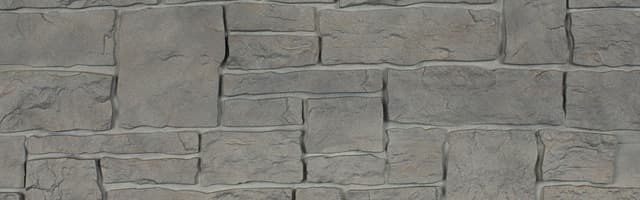
NovikStone Artisan Cut delivers the traditional look of hand-laid stacked stone with the rich colours found in natural stone. Its striking appearance is designed to be used as a knee wall, accent wall, or even a full wall — wherever authentic stone character makes the greatest impact.

Length37.9" exp. / 45" full (96.2 cm / 114.3 cm) per panel
Height / Width18.8" exp. / 20.25" full (47.6 cm / 51.44 cm) per panel
Panel Weight3.3 lbs (1.5 kg) per panel
Panels/Box10 pcs/box
CoverageApprox. 1/2 sq. (approx. 49 sq. ft. / 4.60 m²) per box
InstallationHorizontal — full facade, knee wall, or accent zones

Corner: 6.1" × 19" exp. / 6.1" × 21.3" full (15.5 cm × 48.3 cm exp. — 15.5 cm × 54 cm full) | 5 corners per box. Siding panels must finish at 3-1/2" (8.89 cm) from the corner wall edge. Required opening for finishing trim: 1" (2.54 cm). Leave 1-1/2" gap at wall ends when using decorative corners.

Certifications & Testing Standards

NovikStone AC Artisan Cut meets or exceeds the following Canadian and international performance standards.

Test / PropertyStandardResult / Value
CCMC 13420
--R — National Research Council of Canada (certified July 7, 2009, revised February 5, 2021)
Complies with National Building Code (NBC) of Canada 2015 — Part 9, Housing and Small Buildings
-Certified
Ontario Ruling No. 14-23-319 (13420-R) — approved for use in Ontario
-Certified
ICC-ES Evaluation Report — International Code Council Evaluation Service
-Certified
TDI Approvals — Texas Department of Insurance wind resistance
-Certified
MasterFormat 07 46 33.04 — Polypropylene Siding classification
-Certified
Lifetime Limited Warranty (individual owners) | 50-Year Prorated Warranty (non-individual owners)
-Certified

Compatible Accessories

Installation Guide

  1. Preparation: install at the lowest point of the structure, working left to right. Install Universal Starter Strips first — ensure the horizontal starting line is perfectly level and square with the wall. Leave a 1-1/2" (3.81 cm) gap at each wall end when using decorative corners. If a floor is against the wall, leave a 5/8" (1.59 cm) gap between the starter strip and the floor. If there is no floor, install starter strips flush with the wall base. Nail through nailing holes at maximum 8" (20.32 cm) intervals, including the center hole. Slide successive starter strips leftward to the stopper in the previous one.

  2. Fastener requirements: use non-corrosive (aluminum or galvanized) nails or screws with a head diameter of minimum 0.4" (1 cm) and a shank diameter of 0.150" (0.38 cm). Fasteners must penetrate a minimum of 1-1/4" (3.18 cm) into a solid surface. For furring walls: install furring strips obliquely at 8" (20.32 cm) spacing — furring strips must be installed obliquely (not vertically) with one strip required behind each nail hole.

  3. Nailing each panel: nail the center hole first to ensure even movement in both directions during expansion and contraction. Then nail both end holes and the lateral hole. Minimum 5 nails in the nailing channel at maximum 16" (40.64 cm) intervals, plus one nail in the lateral hole — minimum 6 nails total per full panel. Never hammer nails flush — leave a 1/16" (0.16 cm) gap. If a panel has no center hole, drill a new 1/8" (0.32 cm) diameter hole at the same height as the other installation holes.

  4. Panel assembly & temperature adjustment: hook panels onto the starter strip and slide over the previous panel — lock tabs on both sides and space equally. At temperatures above 40°F (5°C): slide panel to the stoppers. At temperatures below 40°F (5°C): adjust to the temperature line indicated. When resistance is felt, do not force insertion. Finish one complete wall before beginning another.

  5. Row stagger: start the second row with a 16" (40.64 cm) offset from the cut line of the first row. Slide the bottom hooks into the top of the previously installed row. Alternate the cut position on the first panel of each new row to achieve authentic random-stone appearance.

  6. Decorative corner installation: corners are installed after all adjacent wall siding rows are complete — panels must finish at exactly 3-1/2" (8.89 cm) from the corner wall edge at equivalent height. First corner: insert hooks into starter strip and overlap siding panel ends, fold top toward the corner, nail through oblong holes. Subsequent corners: insert hooks into the nailing strip of the previous corner, fold top and nail. Last corner only: cut excess, create custom knife-cut slots (wider than nail shank, narrower than nail head) and affix a nailing strip behind before fastening.

  7. Last row / cut panels without nail holes: in concealed spots, use a knife to create 1/2" (1.27 cm) slots wider than the nail shank but narrower than the nail head. Do not set accessories directly on siding — fasteners must reach solid substrate. If mounting accessories on siding is unavoidable, create 1/2" slots in a concealed spot.

  8. Trim finishing: leave a 1/4" (0.64 cm) gap between any trim (NovikTrim or J-Channel) and the siding panel end. The required opening for NovikStone AC finishing trim is 1" (2.54 cm). For inside corners: finish with (A) inside corner post, (B) two J-trims, or (C) two NovikTrim pieces. Always seal the inside corner of the wall before installing any trim.

  9. Installation over masonry / stucco / CMU: apply a proper weather-resistant barrier first. Install vertical 1"×3" (2.54×7.62 cm) pressure-treated furring strips obliquely at 8" (20.32 cm) o.c., fastened into masonry with corrosion-resistant fasteners penetrating minimum 3/4" (1.91 cm) into the wall. A furring strip must align behind every nail hole. Shorten fasteners to 1" (2.54 cm) if furring is applied directly on masonry. Dry-fit a panel first to identify locations needing additional nailing blocks at lateral slot positions.

  10. Cutting: use a circular saw with a finishing blade. Care & maintenance: NovikStone AC requires no painting, staining, caulking, or masonry maintenance. Clean annually or every other year with plain water and a garden hose (< 100 psi). For stubborn dirt, use a diluted mild laundry detergent solution (1/3 cup per 4 quarts water) with a soft-bristle brush. Always clean bottom-up and rinse top-down with clear water. Do not use a pressure washer (voids warranty). Avoid abrasive cleaners, steel wool, solvents, bleach, citrus cleaners, TSP, sunscreen, and acetone.

Ready to order NovikStone AC Artisan Cut?

Submit your spec list and we'll respond with pricing and availability - usually within one business day. Available in 2 colours for your project.

Get a wholesale quote

Tell us the product, colour, and quantity - we'll handle the rest.

Request a Quote
or call us at+1 (905) 836-7272