Skip to main content
Exterior Pro Materials
KaycanRichmond™

Comfort and Tradition

Kaycan Richmond™

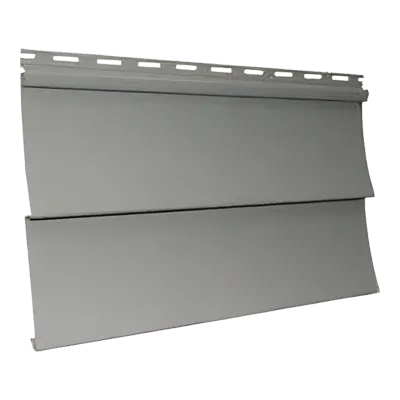
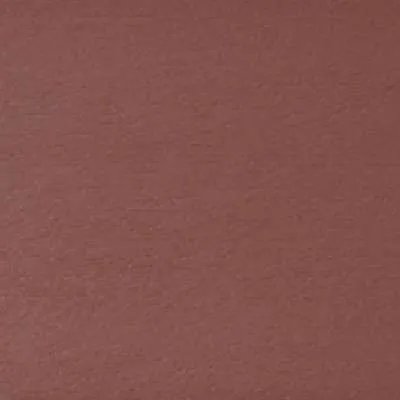
Kaycan Richmond™ brings time-honoured 6" bevel styling to premium vinyl siding. The exclusive Cyclone-System™ double-thick nail hem and heavy-duty 0.050" panels deliver exceptional rigidity and wind resistance, while Chromalock™ technology keeps colour locked throughout the panel — without chipping or fading. A full 3/4" profile depth creates dramatic shadow lines that capture authentic traditional craftsmanship. Nine heritage-inspired colours — from warm Brick and Spice to deep Cobalt and Evergreen — available nationally across Canada.

0.050" (heavy gauge)9 colours

Available Colours

9
Kaycan Richmond™ - Brick

Brick

Richmond™ Collection

Richmond™ Collection(9)

Colours shown are approximate representations only and may appear differently on screen than the actual product. Request a physical sample before making your final decision.

Profiles & Specifications

Kaycan Richmond™ - D6 Richmond™ Panel profile
0086D6 Richmond™ Panel

Double 6" bevel lap panel with full 3/4" profile depth and realistic woodgrain texture — delivers dramatic shadow lines and authentic traditional appearance

Length12' (3.66 m)
Panels/Box9 panels/carton
Coverage100 sq. ft. (9.29 m²) per carton
Gauge0.050" (heavy gauge)
Profile Depth3/4"

Compatible Accessories

Installation Guide

Critical Installation Rules

  1. Never face-nail siding — always fasten through the nailing hem only

  2. Leave 1/32" clearance between fastener head and nailing hem (panels must move freely)

  3. Leave 1/4" expansion gap at all openings, corners, and trim junctions — increase to 3/8" in cold climates or below 40°F

  4. Do not caulk between panels, between siding and J-channel, or between siding and corner trim — panels must expand and contract freely

  5. When installing a panel, push up from the bottom until the lock is fully engaged with the piece below, then fasten without stretching

  6. Drive fasteners straight and level — nailing at an angle distorts panels and causes buckling

  7. When finishing top of wall, perforate cut edge with snap-lock punch approximately every 8" so tabs face outward

  8. Overlap horizontal siding panels approximately 1" — excessive overlap restricts free movement and can cause product failure

  9. Stagger end lap joints so no two courses are vertically aligned unless separated by at least 3 courses

  10. Always overlap joints away from entrances and away from the point of greatest traffic

  11. Check every fifth or sixth course for horizontal alignment; also check alignment with adjoining walls

  12. Use fasteners long enough to penetrate a minimum of 3/4" into the nailable base

  13. Install starter trim level — it sets the alignment for all subsequent courses; nail at 10" intervals

  14. Keep starter strip ends at least 1/4" apart from corner posts and J-channels to allow for expansion

  15. Apply drip cap above all windows and doors before installing siding over them

  16. Do not install over foil-backed foam insulation — voids Kaycan warranty

  17. Asbestos siding is a regulated material — contact the appropriate environmental agency before residing over it

  18. Check all local building codes and fire regulations before installation; local code requirements always take precedence

  19. In new construction, avoid green lumber as underlayment — siding can only be as straight as what lies beneath it

Tools & Equipment

General Tools

  • Work table
  • Chalk line
  • Safety glasses
  • Tape measure
  • Carpenter's square
  • Ladders or scaffolding
  • Hammer
  • Tin snips
  • Utility knife
  • Level
  • Radial arm saw (with reversed fine-tooth blade for cutting vinyl)

Specialty Tools

  • Snap-lock punch — creates raised tabs on cut panels to lock into trim
  • Nail-slot punch — adds or extends nailing slots in repositioned panels
  • J-trim cutter — clean cuts on J-channel without distortion
  • Siding removal tool (zip tool) — unlocks siding courses during repairs

Fastener Requirements

Nails
Material
Aluminum, galvanized steel, or corrosion-resistant
Head
5/16" minimum
Shank
1/8"
Penetration
3/4" into solid wood
Screws
Type
#8 truss head or pan head, self-tapping
Penetration
3/4" into solid wood
Clearance
1/32" clearance required (do not overtighten)
Staples
Gauge
16-gauge minimum
Crown
Semi-flattened elliptical crown
Penetration
3/4" into solid wood
Hem clearance
1/32" from nailing hem edge

Accessory Applications

AccessoryPurposeWhere to use
Kaylok Aluminum Starter Trim (108200)2-1/2" aluminum starter with Kaylok system — provides solid base and resists wind liftFirst course anchor — sets the angle and alignment for the entire installationBottom of wall, level, 1" above finished grade or above foundation; nail at 10" intervals
3/4" J Trim (VJG034)3/4" deep channel designed for Richmond's full 3/4" profile depth; 1-7/16" face heightFrames doors, windows, and other wall penetrationsAround door and window openings — sides and top
3-1/2" Outside Corner (VCMNN3)3-1/2" wide face with 3/4" channel depth to accept Richmond's full profileFinished outside corners where two walls meet at an exterior anglePlumb at outside corners; Richmond panels slide into 3/4" channels
3/4" Inside Corner (VCGINP)3/4" wide channel, 1-3/8" base — matches Richmond's 3/4" profile depthFinished inside corners where two walls meet at an interior anglePlumb at inside corners; panels slide into 3/4" channels on each side

Estimating & Ordering

Formula

Siding required = [Wall area (Step 1) + Gable/dormer area (Step 2) − Openings area (Step 3)] + 10% waste

1 square = 100 sq.ft. (standard industry unit); Richmond carton covers 1 square exactly

  1. Step 1 — Sketch all four sides of the home; for each wall multiply height × width to get surface area in sq.ft.

  2. Step 2 — Measure gables and dormers: for each triangle measure straight up from the base to the top, then multiply base × height × 0.5; add all gable/dormer areas together

  3. Step 3 — Measure all openings NOT to be covered (windows, doors, chimneys) and multiply height × width for each; add together

  4. Step 4 — Add Step 1 + Step 2, subtract Step 3, then add 10% for cutting waste: Siding required = [Step 1 + Step 2 − Step 3] + 10%

  5. Step 5 — Divide total sq.ft. by 100 to determine the number of cartons needed (1 carton = 100 sq.ft.); round up to next whole carton

  6. Step 6 — Measure under eaves: multiply the length by the width of each overhang and add together (for soffit calculation)

  7. Step 7 — Determine soffit squares: divide soffit total from Step 6 by 100

  8. Step 8 — Measure linear feet of each accessory (starter trim, J-trim, corner posts, drip cap)

  9. Step 9 — Order accessories: starter trim and J-trim by linear feet; corners by linear feet; all available in 10' lengths (corners) or 12'6" (J-trim)

Colour is manufactured throughout the panel — scratches or cut edges are not visible from normal viewing distance

Storage & Handling

  • Store cartons flat on a level surface, supported along their full length
  • Keep cartons dry and away from rain and prolonged direct sunlight
  • Store away from areas where falling objects or construction activity may cause damage
  • Maximum stacking height: 6 boxes high — ensure stacks are stable
  • Maximum storage temperature: 130°F / 54.4°C (avoid blacktop pavement in summer, dark tarps without air circulation)
  • Do not drag bundles — carry or use a panel carrier to avoid scratching and distortion

Ready to order Kaycan Richmond™?

Submit your spec list and we'll respond with pricing and availability - usually within one business day. Available in 9 colours for your project.

Get a wholesale quote

Tell us the product, colour, and quantity - we'll handle the rest.

Request a Quote
or call us at+1 (905) 836-7272