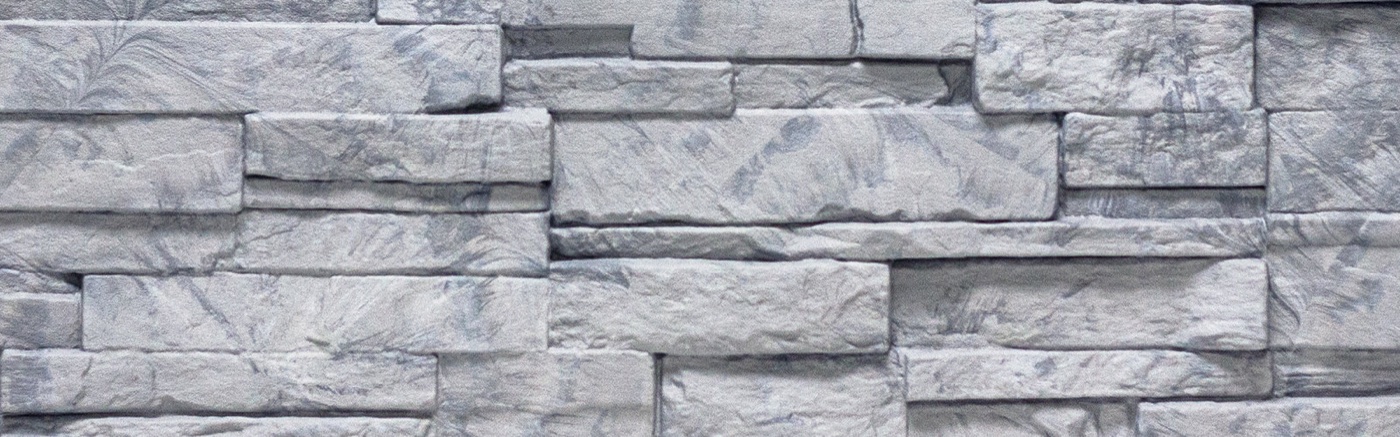
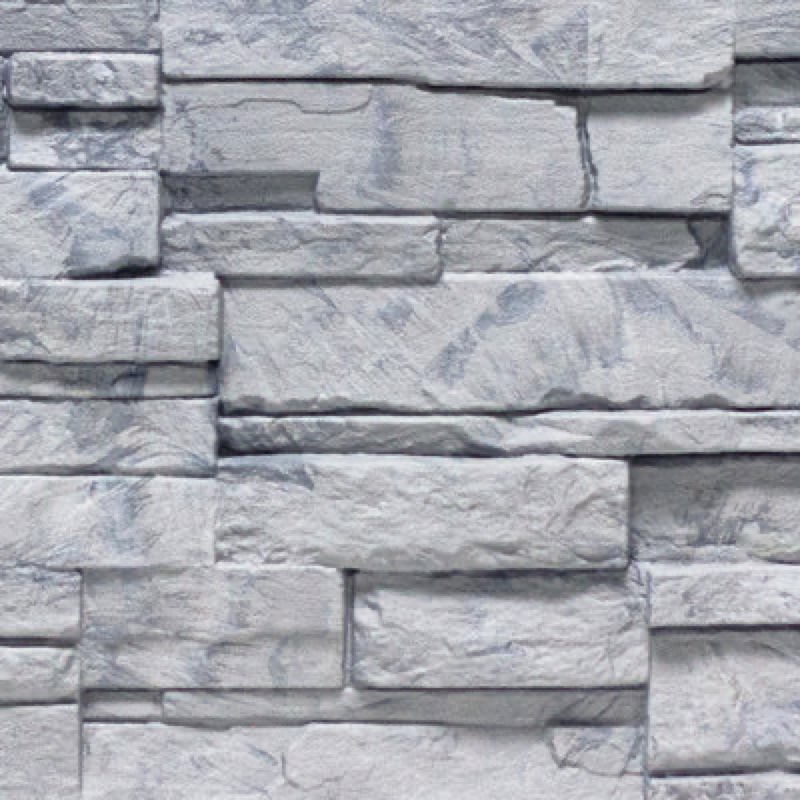
- 1
Preparation: install at the lowest point of the structure, working left to right. Always install decorative corners before starter strips where corners are required. Install Universal Starter Strips at the lowest point — ensure the horizontal starting line is perfectly level and square with the wall. Leave a 1/2" (1.27 cm) gap at each wall end when using NovikTrim or J-Channel. If the lowest installation point is at floor level, leave a 1-13/16" (4.61 cm) gap between the starter strip and the floor. Nail starter strips through the center hole and all nailing holes at maximum 8" (20.32 cm) intervals. Slide successive starter strips into each other leftward to the stopper.
- 2
Fastener requirements: use non-corrosive (aluminum or galvanized) nails or screws with a head diameter of minimum 0.4" (1 cm) and a shank diameter of 0.150" (0.38 cm). Fasteners must penetrate a minimum of 1-1/4" (3.18 cm) into a solid surface. For furring walls: install furring strips at 8" (20.32 cm) o.c. with one strip behind each nail hole.
- 3
Nailing each panel: first nail the left end of the nailing channel. Then, maintaining the panel down to preserve the lower joint, nail the center hole — this ensures even movement in both directions during expansion and contraction. Then nail the right end of the nailing channel and both lateral holes. Minimum 5 nails in the nailing channel at maximum 16" (40.64 cm) intervals. Never hammer nails flush — leave a 1/16" (0.16 cm) gap. If a panel piece has no center hole, drill a new 1/8" (0.32 cm) diameter hole at the same height as the other installation holes.
- 4
Panel assembly: cut the left side of the first panel in a clean, straight line — this cut is visible. Insert the panel onto the starter strip using the hooks on the back and slide up to the corner trim. No gap required between the panel and corners. Hook successive panels onto the starter strip and slide into the previous panel; lock tabs on both sides — butt panels tight, no gap needed. Measure the wall length before starting to avoid a very small piece at the right end. For a better appearance, cut panels against corners at a 3° angle.
- 5
Row stagger: start the second row with a 16" (40.64 cm) offset from the cut line of the first row. Slide the bottom of the panel into the continuous slot on top of the previously installed row. Alternate the offset position on each new row to create an authentic random-stone appearance.
- 6
Decorative corner installation: join two corner sections together to form an inside or outside corner — one assembly provides 15.1" (38.35 cm) linear coverage. Install first corner assembly at the base of the wall, nailing the center hole and both extremities on each piece. If at floor level, butt the bottom of the corner assembly against the floor. Install subsequent corner assemblies by inserting each into the lower one and nailing. Last corner only: cut excess, insert into lower corner, and nail (if no center hole, nail only the two extremities).
- 7
Last row / cut panels without nail holes: in concealed spots, use a knife to create new 1/2" (1.27 cm) slots wider than the nail shank but narrower than the nail head. Nail at maximum 16" intervals. To straighten a panel, add shims behind the new nailing slots.
- 8
Alternative base finish: for a neater base appearance, install NovikTrim1 at the base — set starter strips at 2-1/4" (5.72 cm) from the wall base and NovikTrim1 Base at 3/16" (0.48 cm) from the base. Once the first row is complete, install NovikTrim1 Top to the desired depth.
- 9
Vertical installation (indoor/accent): install from left to right, starting at the highest point and assembling downward. Install decorative corners first, then starter strips vertically at the right side of corners — leave 1-13/16" (4.61 cm) gap between corners and starter strips. Nail panels as in standard installation. Each successive row offsets 16" from the previous cut line. For the last row, cut excess in a clean straight line, insert into previous row, and fasten through lateral holes with small screws in concealed spots.
- 10
Heat sources: when installing near a heat source such as a fireplace or electric baseboard heater, the installer is responsible for ensuring panels will not exceed 176°F (80°C). Maintain safe clearance distances.
- 11
Care & maintenance: NovikStone Carrara Collection requires no painting, staining, caulking, or masonry maintenance. Clean periodically with mild soap and water using a soft-bristle brush — clean bottom-up and rinse top-down with clear water. Do not use a pressure washer, abrasive cleaners, or strong solvents.