
CV9Ced'R-Vue™ 9″ Board
| Length | 12 ft (3.66 m) |
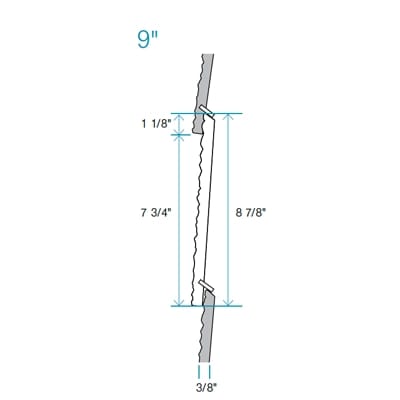
| Nominal Width | 9 in (22.86 cm) |
| Nominal Thickness | 3/8" (0.95 cm) |
| Coverage | 7.75 sq ft per board |
| Per Package | 4 pieces |
| Installation | Horizontal only |
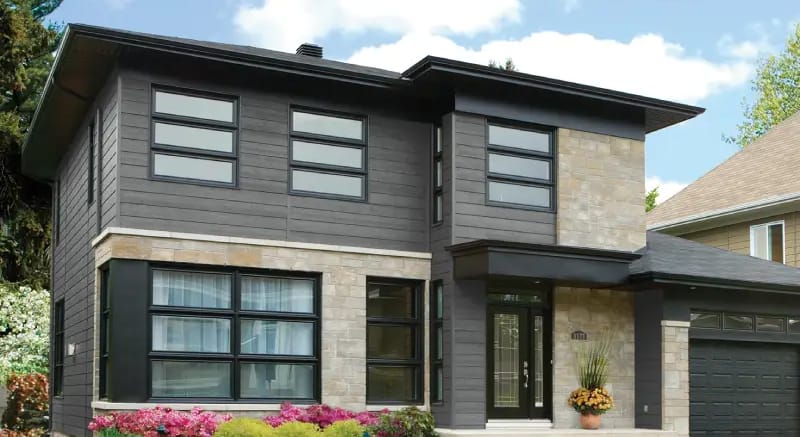
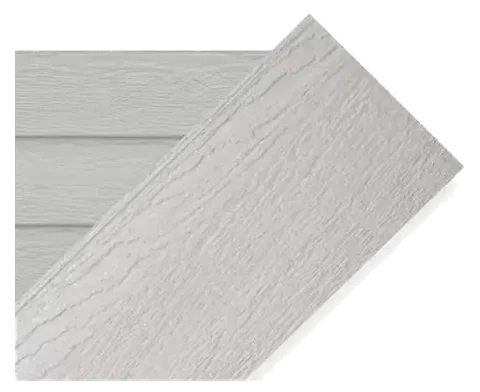
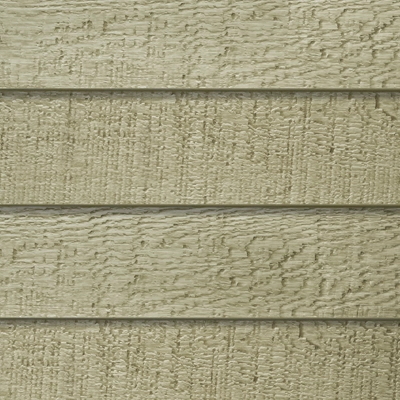
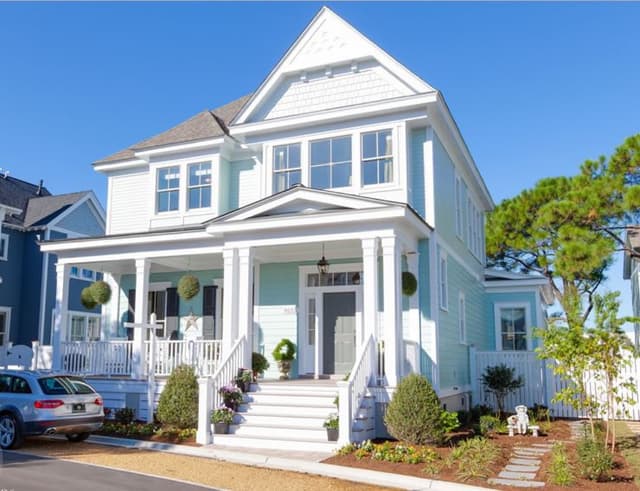
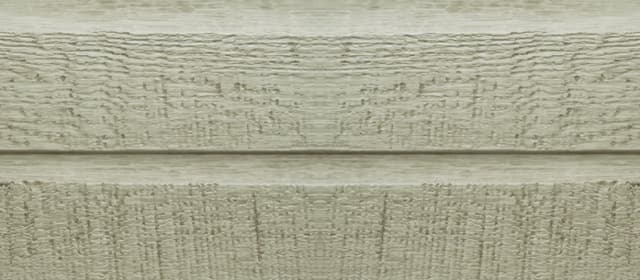
Designed to provide the genuine look of cedar while offering the strength and longevity of engineered wood.
Ced'R-Vue™ 9″ CanExel® engineered wood siding, distributed in Canada by Kaycan, delivers the authentic look of cedar lap siding with the durability and low maintenance of engineered wood. Each 12-ft board (9 in nominal width, 3/8" nominal thickness) covers 7.75 sq ft and installs horizontally using a unique plastic spline system that locks courses together for a precise fit. The multi-coat industrial-grade thermoset paint finish — cured at high temperatures — resists fading, cracking, splitting, and peeling. Available in 8 colours. Backed by a prorated 25-year limited warranty (buckling, peeling, separating, chipping), a 15-year finish warranty, and a 5-year 100% labour and replacement warranty.
Acadia
Other(8)
Colours shown are approximate representations only and may appear differently on screen than the actual product. Request a physical sample before making your final decision.
Ced'R-Vue™ 9″ CanExel® engineered wood siding, distributed in Canada by Kaycan, delivers the authentic look of cedar lap siding with the durability and low maintenance of engineered wood. Each 12-ft board (9 in nominal width, 3/8" nominal thickness) covers 7.75 sq ft and installs horizontally using a unique plastic spline system that locks courses together for a precise fit. The multi-coat industrial-grade thermoset paint finish — cured at high temperatures — resists fading, cracking, splitting, and peeling. Available in 8 colours. Backed by a prorated 25-year limited warranty (buckling, peeling, separating, chipping), a 15-year finish warranty, and a 5-year 100% labour and replacement warranty.
Ced'R-Vue™ 9″ is a CanExel® engineered wood siding from Maibec, distributed in Canada by Kaycan. Its 9-inch horizontal lap profile is designed to replicate the genuine look of cedar while delivering the strength and longevity of engineered wood. Each 12-ft board has a nominal width of 9 in and nominal thickness of 3/8", covering 7.75 sq ft, with 4 pieces per package. The unique plastic spline system locks each course to the next for a precise, secure fit. The finish is applied in multiple coats of industrial-grade thermoset paint cured at high temperatures for durable resistance to fading, cracking, splitting, and peeling. Available in 8 colours. Backed by a prorated 25-year limited warranty against buckling, peeling, separating, and chipping; a 15-year finish warranty; and a 5-year 100% warranty covering labour and replacement.
Available at Pro Materials in Newmarket, Ontario, supplying contractors, builders, and homeowners across York Region, the GTA, and Ontario. All products are available on a quote basis; contact us for wholesale pricing and current availability.
| Length | 12 ft (3.66 m) |
| Nominal Width | 9 in (22.86 cm) |
| Nominal Thickness | 3/8" (0.95 cm) |
| Coverage | 7.75 sq ft per board |
| Per Package | 4 pieces |
| Installation | Horizontal only |
| Code | Description | Colour |
|---|---|---|
| 820101 | Maibec Ced'R-Vue 9″ x 12′ (4/Pkg) | White |
| 820103 | Maibec Ced'R-Vue 9″ x 12′ (4/Pkg) | Acadia |
| 820104 | Maibec Ced'R-Vue 9″ x 12′ (4/Pkg) | Barista |
| 820105 | Maibec Ced'R-Vue 9″ x 12′ (4/Pkg) | Timberwolf |
| 820113 | Maibec Ced'R-Vue 9″ x 12′ (4/Pkg) | Black |
| 820115 | Maibec Ced'R-Vue 9″ x 12′ (4/Pkg) | Granite |
| 820123 | Maibec Ced'R-Vue 9″ x 12′ (4/Pkg) | Mist Grey |
| 820149 | Maibec Ced'R-Vue 9″ x 12′ (4/Pkg) | Charcoal |
| Specification | Value |
|---|---|
| Length | 12 ft (3.66 m) |
| Nominal Width | 9 in (22.86 cm) |
| Nominal Thickness | 3/8" (0.95 cm) |
| Coverage | 7.75 sq ft per board |
| Per Package | 4 pieces |
| Installation | Horizontal only |
| Standard | Description |
|---|---|
| ANSI 135.6-2006 | Composite Panel Association performance standard |
| CAN/CGSB-11.5 M87 | Canadian engineered wood siding standard |
| NBC s.9.27 | National Building Code of Canada, section 9.27 |
Order quantities and lead times may vary. Contact us for availability.
Ced'R-Vue 9″ must be installed horizontally only.
Compliance with Maibec CanExel installation, storage and maintenance requirements and all applicable building codes is mandatory.
These instructions are in accordance with the National Building Code of Canada, section 9.27.
In QC and coastal provinces (NFLD, NS, NB, PEI, BC) CanExel sidings MUST be applied on furring strips (strapping).
CCMC recommends that all types of horizontal, vertical, and panel sidings for NHA housing in the Atlantic Provinces be installed over furring strips.
Siding may be installed over sheathing or unsheathed walls and nailed into studs spaced not more than 16 in (400 mm) O.C.
Allow at least 8 in (203 mm) between the bottom edge of the siding and the ground. Siding should not come in direct contact with concrete.
Studs must be a minimum 1.5 in × 3.5 in (38 mm × 89 mm).
Siding may be applied over masonry construction with furring strips securely attached on 16 in (400 mm) centres.
A properly installed breathable water-resistive barrier is required behind the siding. Seal all openings for electrical boxes, conduits, pipes, wiring, and any joints or tears in the barrier.
Do not apply siding to a structure with excessive moisture conditions. Allow the structure to dry and ventilate before application.
A vapour barrier with a perm rating less than 1 (e.g. polyethylene or foil) must be installed on the warm side/interior surface of the wall.
Seal all gaps with a high quality, non-hardening, paintable sealant.
Always leave a 3/16 in (4 mm) space wherever siding butts against trim or other materials to allow for expansion. Use J-mould or sealant.
All openings must be properly sealed or flashed to prevent moisture intrusion or buildup.
Siding adjacent to porches, patios, walks, etc. must have a clearance of at least 2 in above any surface.
Install kick-out flashing to direct water into the gutter. Install step flashing with minimum 4 in upper leg.
Do not extend the siding or trim into the kick-out flashing or gutter.
Minimum 2 in clearance between trim and roofing material.
When furring strips are required, install them VERTICALLY, nailed into wall studs 16 in (400 mm) O.C. over the full height. Furring strips must be at least 1/4 in (6 mm) thick.
Ensure ventilation — both top and bottom of the space between furring strips must be left open. Protect the bottom opening with an insect screen.
Under and above windows and above doors maintain spacing of 2 in between furring strip and horizontal framing.
At the bottom, a short furring strip (~12 in / 300 mm) should be installed VERTICALLY, centred between each main furring, to support the insect screen.
For re-siding: new siding must be installed on furring strips after the weather-resistive barrier is replaced. Old siding must be removed.
Use corrosion-resistant nails with a minimum 0.113 in diameter shank and 0.240 in head.
Maintain a minimum 1-1/4 in fastener penetration into the stud, strapping, or combination thereof.
Fasten along the nail-line no greater than 16 in O.C. DO NOT USE STAPLES.
Blind nailing is required except around windows and other wall openings.
Do not force or spring siding into place — this will cause buckling.
Do NOT countersink nail heads.
Use a fine-toothed saw or a power saw with a combination blade. Ensure that the cutting action is toward, or into, the finished side — this prevents the paint surface from chipping.
Paint ALL exposed cut edges.
STEP A: Level and install metal starter strips along the bottom edge of sheathing or sill plate, or up to 1 in (25 mm) below, as required by course layout.
STEP B: Install continuous outside corners (if used in lieu of individual corners) and continuous inside corners before siding.
STEP C: Use drip caps above windows and doors; use J-moulds on each side. Extend drip cap past J-moulds, cut at angle, and bend down over J-mould to prevent water entry at the junction.
STEP D: Install first course so that the plastic spline on the back of the siding fits over the edge of the starter strip. Nail at the nailing line (~1/2 in / 12 mm from top edge) at each stud or furring strip, leaving no more than 16 in (400 mm) between nails. Begin nailing at one end and work toward the other end to prevent rippling. Ensure strips are aligned at corners of the building.
STEP E: Joints between adjacent boards must be located over the middle of a stud or furring strip. Leave a 3/16 in (5 mm) gap; nail both pieces into the stud or furring strip. Insert a joint moulding or seal with a high quality paintable non-hardening sealant. Avoid overlapping sealant onto the face of the siding. Stagger joints from one course to the next.
STEP F: Install subsequent courses so that the plastic spline on the back fits over the top edge of the previously installed course. Install individual outside corners with each lap if not using continuous corners.
General Tools
Submit your spec list and we'll respond with pricing and availability - usually within one business day. Available in 8 colours for your project.
Get a wholesale quote
Tell us the product, colour, and quantity - we'll handle the rest.
